Table of Contents
This chapter contains information that explains how you can customize the One Page Checkout code in order to personalize the checkout procedure for your customers.
AJAX technology is used to give an improved user experience in this critical area where you don't want your customers to leave your shop. We use Google's Web Toolkit http://code.google.com/webtoolkit embedded inside the Struts application.
All the source code for the one-page checkout is freely available for you to modify as you see fit.
To get you started with this, especially if you're unfamiliar with Google's "GWT", we provide a simple one-page checkout developers toolkit. This allows you to modify the one-page checkout code, recompile and run, quickly and easily, without needing the rest of the application running.
The one-page checkout developers toolkit is included in every KonaKart download and can be found under the custom directory where KonaKart was installed. On Windows the default location is: C:\Program Files\KonaKart\custom\onepagecheckout .
1) Create a command shell window and change directory to the onepagecheckout directory inside your KonaKart installation. The directory should contain the following files:
 Directory of C:\Program Files\KonaKart\custom\onepagecheckout

06/01/2010  11:58    <DIR>          .
06/01/2010  11:58    <DIR>          ..
05/01/2010  15:26             5,937 .classpath
05/01/2010  15:26               442 .project
05/01/2010  15:26               514 build.properties
05/01/2010  15:26             6,090 build.xml
05/01/2010  15:26             2,878 KonaKart_One_Page_Checkout.launch
06/01/2010  11:58    <DIR>          lib
06/01/2010  11:58    <DIR>          src
06/01/2010  11:58    <DIR>          war
               5 File(s)         15,861 bytes
2) Ensure that you have a java installation installed. KonaKart requires the Java 2 Standard Edition Runtime Environment (JRE) version 6.0 or later. Download the Java 2 Standard Edition Runtime Environment (JRE), release version 6.0 or later from http://java.sun.com/j2se. (You've probably already done this since it is required to run KonaKart).
3) Ensure that you have installed Apache ANT (this is used by the supplied ANT build file that compiles and runs the code). (Alternatively, you can use the ant that's provided under the custom/bin directory).
4) Modify the build.properties file to suit your environment. You have to define your database connection parameters because the code that you run will need to access the database. Use the database connection parameters that you have set up for your KonaKart application.
# --------------------------------------------------------------------------------------
# konakart_gwt build properties
#
# Set the parameters in this file to suit your environment
# --------------------------------------------------------------------------------------

# Database Parameters

adapter=mysql
user=root
password=
url=jdbc:mysql://localhost:3306/store1?zeroDateTimeBehavior=convertToNull
driver=com.mysql.jdbc.Driver
validationQuery=select 1

# KonaKart Home

KONAKART_HOME=../../
4) Add an item to your shopping cart. Run the KonaKart application and add an item (or many items) to a user's shopping cart. You need to do this to access the one-page checkout when it's run.
5) Finally, you are ready to build and run the code as follows by simply running ant. Note that the file KKGWTServiceImpl.java, instantiates a KonaKart engine which is normally already instantiated when the one page checkout code is embedded within the store front application. It is coded to instantiate an engine in MODE_SINGLE_STORE. If you are setup to run in multi-store mode then you must change the code accordingly.
C:\Program Files\KonaKart\custom\onepagecheckout>..\bin\ant
Buildfile: build.xml

clean:
     [echo] Cleanup...

copy_libs:
     [echo] Copy Jars...

copy_images:
     [echo] Copy Images...

compile:
     [echo] Compile the sources
    [mkdir] Created dir: C:\Program Files\KonaKart\custom\onepagecheckout\war\WEB-INF\classes
    [javac] Compiling 82 source files to
                         C:\Program Files\KonaKart\custom\onepagecheckout\war\WEB-INF\classes
     [echo] GWT-Compile the sources

setConfigs:
     [echo] Set Configs to:
     [echo]     adapter         = mysql
     [echo]     driver          = com.mysql.jdbc.Driver
     [echo]     user            = root
     [echo]     password        =
     [echo]     url             =
                         jdbc:mysql://localhost:3306/store1?zeroDateTimeBehavior=convertToNull
     [echo]     validationQuery = select 1

run:
     [java] KonakartGWTServer() Engine to be used by application is com.konakart.al.KKAppEng
     [java] getAppEngByName(com.konakart.al.KKAppEng)
     [java]
     [java] **********************************************************************************
     [java] * KONAKART LICENSE AGREEMENT                                                     *
     [java] * You may not use this software except in compliance with the licenses.          *
     [java] * Please study the licenses on the KonaKart website  for the rights, obligations *
     [java] * and limitations governing the use of this software.                            *
     [java] * For users of the Community Edition of KonaKart see:                            *
     [java] *         http://www.konakart.com/documents/COMMUNITY-LICENSE.txt                *
     [java] * For users of the Enterprise Extensions of KonaKart see:                        *
     [java] *         http://www.konakart.com/documents/ENTERPRISE-LICENSE.txt               *
     [java] **********************************************************************************
     [java]

build:

BUILD SUCCESSFUL
When the one-page checkout code runs it will launch the GWT "dev mode" shell which allows you to test your code changes.
You have to set up a KonaKart application user (or use the default John Doe account which has email address: "root@localhost" and password "password"). To run the one-page checkout in the GWT "Dev Mode" enter your user's credentials as instructed:
First the username which is an email address. The default username that is created at installation is root@localhost :
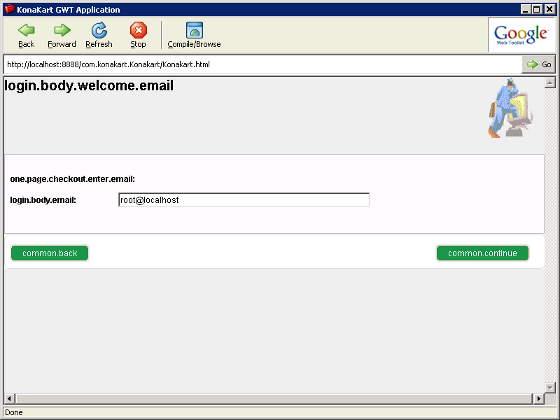
Next enter the password. The default password that is created at installation is password :

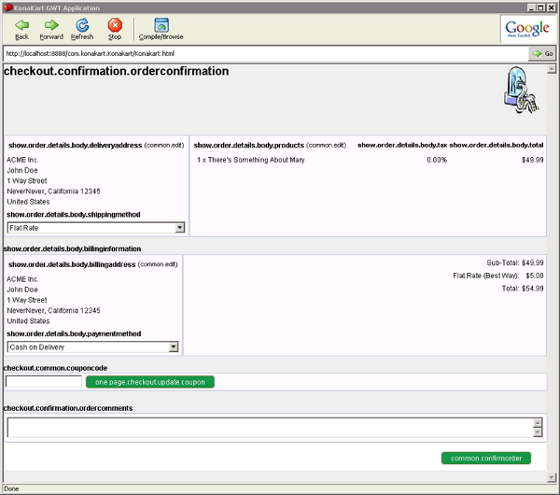
If successful, and your user has a product in their shopping cart, you will see the following which is the one-page checkout screen:
Notes;
You will notice that the configurable text strings (for labels and headings etc) are shown with their properties file references and not their translated names. This should help you locate the messages in the message catalogues, especially if you need to translate them.
To test your one-page checkout in a fully-integrated fashion (and with the message catalog references translated) you will have to copy the generated javascript files into position (under the konakart webapp).
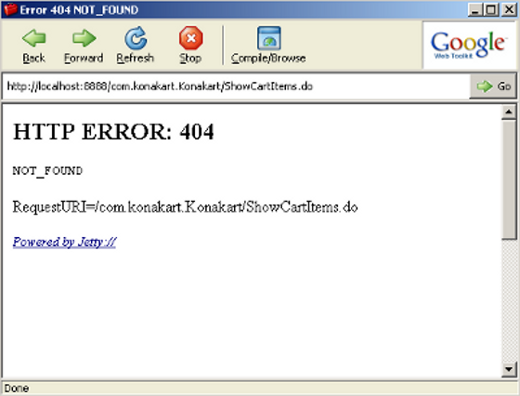
A common error is to forget to place an item in your user's cart before running the one-page checkout. If you don't add at least one product to your user's cart you will see this error:
GWT has an extremely useful debugging system that integrates with Eclipse. This allows you to debug both client and server code in the Eclipse debugger. This is highly-recommended if you expect to be writing anything more than the most trivial modifications to the one-page checkout.
To set up the One Page Checkout as an Eclipse project:
Execute the default ANT task as above to copy libraries and images into position.
In Eclipse, use "File Import" then choose "Existing Projects into Workspace" and click "Next". Browse for the onepagecheckout directory (under the custom directory where you installed KonaKart). Once selected, note that the KonaKart_one_page_checkout project should have been found.
Finally, take all the defaults and click "Finish" which will create your Eclipse project which you should see as "konakart_one_page_checkout" in your workspace.
In addition to loading the source code ready to edit, the project has also defined a run configuration (called "KonaKart_One_Page_Checkout") which can be used to run the one page checkout from Eclipse.