Note that when creating expressions we often use the numeric internal ids of products, categories and manufacturers to identify them. These ids are visible in the admin app although they may be hidden by setting the configuration variables under the Admin App Configuration sub menu.

The id of a product (and SKU) may be viewed as you move your mouse over the product name in the Products panel:

It may also be viewed in the Details tab of the Edit Product panel:

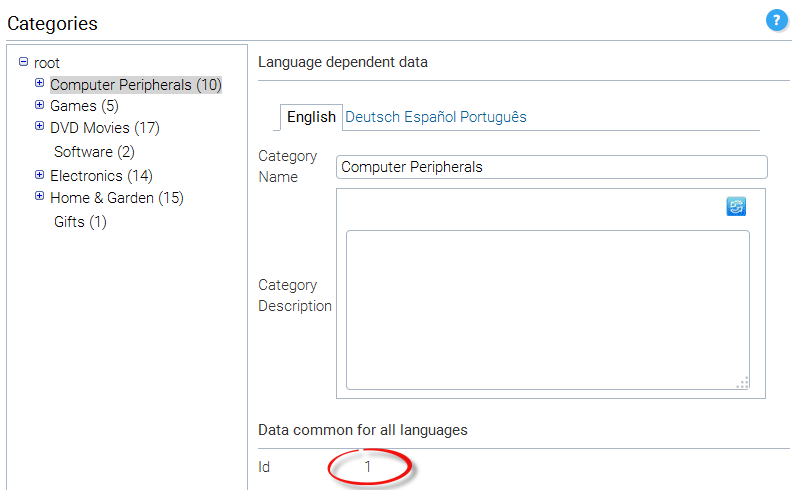
The id of a category is visible in the Categories panel:
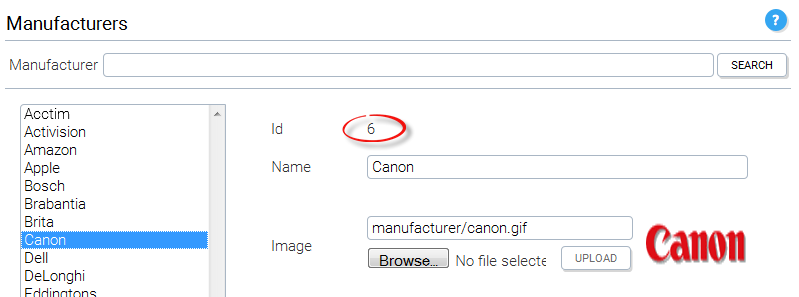
The id of a manufacturer is visible in the Manufacturers panel:
Now that we know where to find the ids, lets move on to the expression that we want to create. As explained in the example above we want to create an expression to show a banner to a customer if his cart already contains $50.00 worth of goods and he has Product A in his wish list or he has recently viewed Product A. For the sake of the tutorial we can attribute a product id of 10 to Product A. Let's create an expression called MY_EXPRESSION as shown below.
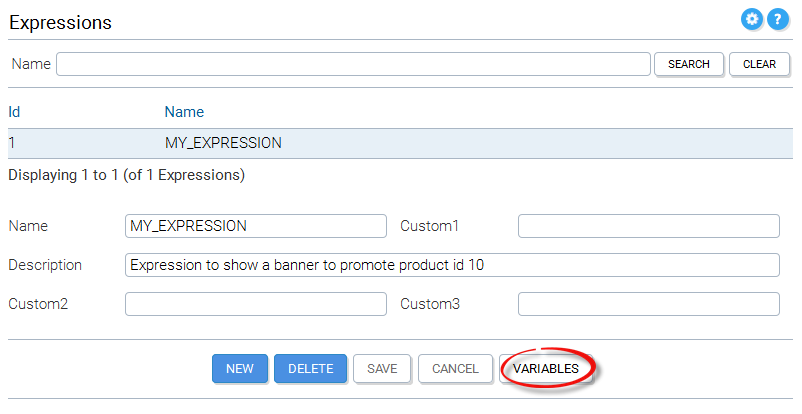
Once the expression has been saved, we must click on the Variables button in order to open a new panel where we can enter the expression variables that define the expression.

Click the New button to create the first variable.

We choose CartTotal from the list of customer tags and give it a value of >= 50. Now we must AND this tag with the the following two tags OR'ed together. To achieve this, we click the Group button.
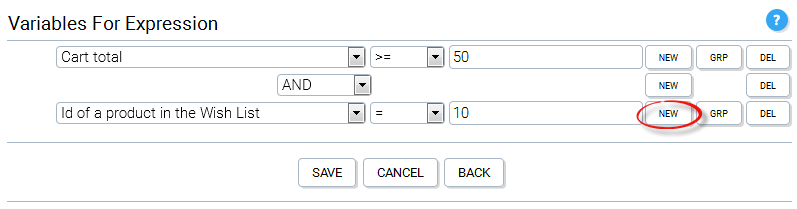
After entering the Customer Tag value for product in wish list, we need to OR it with the recently viewed product tag, by clicking the New button.
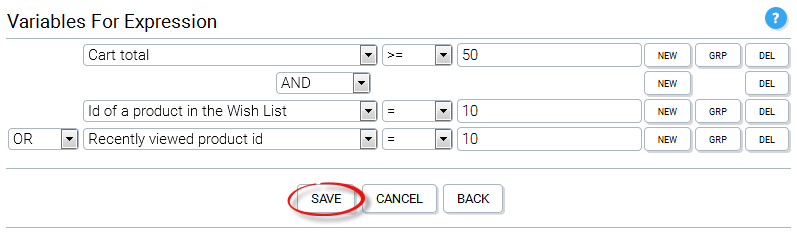
Now we can click the save button to save the expression variables.
We have created the expression: (Cart_Total >= 50) AND ((prod in wishlist == 10) OR (recently viewed prod == 10))
The demo store front contains a tile called DynamicContentTile.jsp which is an example of how a tile can be displayed only if an expression evaluates to true. If you take a look at the source code of the JSP you'll see that the tile is only dispayed if:
customerTagMgr.evaluateExpression(-1,"MY_EXPRESSION") == true
The CustomerTagMgr of the Client engine eventially calls the KonaKart eCommerce engine API call:
boolean evaluateExpression(String sessionId, int expressionId, String expressionName)
or
boolean evaluateExpressionForGuest(int customerId, int expressionId,String expressionName)
depending on whether the customer is logged in or not.
Note that before experimenting with expressions you must enable customer tags in the Customer Details section of the configuration variables, as shown below:

The code that sets the wish list and cart customer tags is embedded within the client engine and so this tag functionality has to be enabled separately. All other customer tags are set within the Struts action classes such as CustomerRegistrationSubmitAction.java for which the source code is shipped.
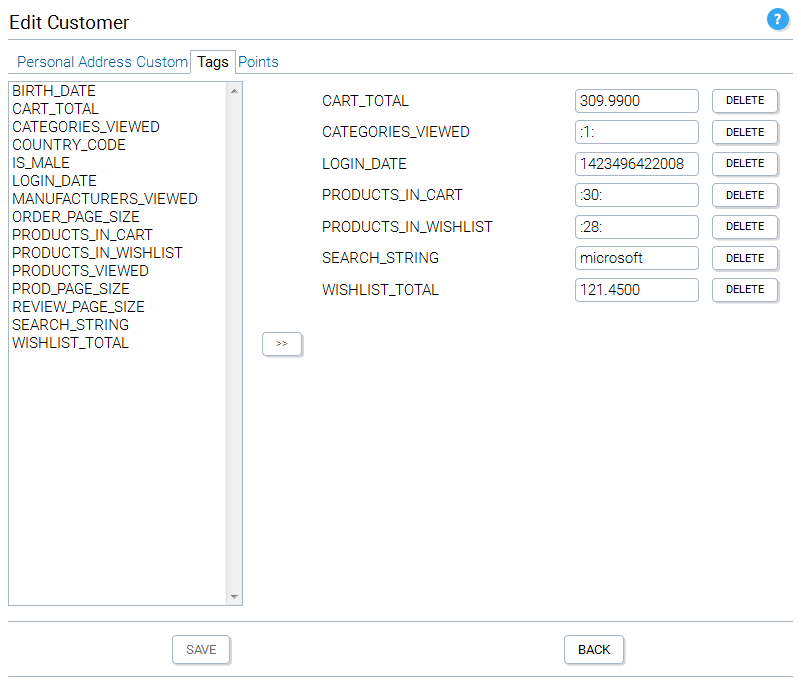
At any time, you can view (and edit) the customer tag values for any customer from the Tags folder of the Edit Customer panel.